
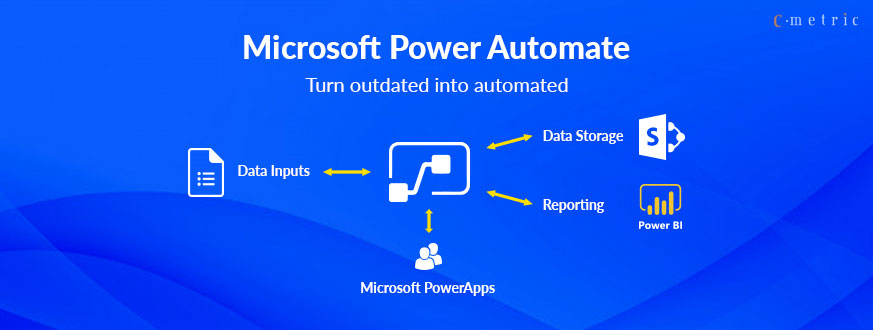
Power Automate (formerly known as Microsoft Flow) is a cloud-based service from Microsoft that allows users to create automated workflows between apps and services to sync files, get notifications, collect data, and automate repetitive tasks. It integrates with a wide range of Microsoft products (like Office 365, SharePoint, and Dynamics 365) and many third-party services (like Salesforce, Dropbox, and Google).
Key Features of Power Automate:
- Automating Repetitive Tasks: It can automate time-consuming and repetitive tasks like sending notifications, approval workflows, and data syncing.
- Integration Across Platforms: Power Automate integrates with over 300 different services including Microsoft apps (e.g., Excel, SharePoint) and external apps (e.g., Twitter, Google Sheets).
- Multi-Step Workflows: You can create workflows that involve multiple steps and conditions, allowing for complex automation scenarios.
- Triggers and Actions: Flows are initiated based on “triggers” (like receiving an email or a new file being added) and then perform a series of “actions” (such as sending a response or updating a database).
- AI Integration: Power Automate includes AI features like form processing, sentiment analysis, and object detection.
Types of Flows in Power Automate:
- Automated Flows: Triggered by specific events, such as when a new email arrives or when a file is added to a folder.
- Example: Automatically save email attachments to a SharePoint folder when they arrive.
- Instant Flows: Triggered manually with the press of a button, either on the web or via the Power Automate mobile app.
- Example: Send a customized email when a button is clicked.
- Scheduled Flows: Run at a specified time or interval, such as every day, week, or hour.
- Example: Send daily reminders to complete a task.
- Business Process Flows: Guided processes that provide a step-by-step path for users to follow, typically used in business apps like Dynamics 365.
- Example: Guide salespeople through the steps of qualifying a lead.
- Desktop Flows (Power Automate Desktop): Automate tasks on your local desktop by recording clicks and keyboard actions to automate UI interactions.
- Example: Extract data from a legacy application by automating manual tasks.
Common Use Cases for Power Automate:
- Automating Approval Processes:
- Example: When a file is uploaded to a SharePoint document library, an automated approval workflow can be triggered to get manager approvals.
- Email Notifications:
- Example: Automatically send an email notification when a new item is added to a SharePoint list or when a form response is submitted.
- Data Collection and Integration:
- Example: Automatically copy data from one app (e.g., Google Sheets) to another app (e.g., Microsoft Excel), ensuring data is synchronized.
- Social Media Automation:
- Example: Automatically post updates to Twitter or LinkedIn when new blog posts are published or specific hashtags are mentioned.
- Customer Support Automation:
- Example: Route support tickets or emails to the appropriate team based on keywords or priority.
- Lead and Opportunity Management:
- Example: When a new lead is added in Dynamics 365 or Salesforce, automatically assign it to the sales team and send a notification.
How to Create a Flow in Power Automate:
- Sign In to Power Automate: Go to the Power Automate website and sign in with your Microsoft account.
- Select a Template or Create from Scratch:
- Power Automate offers many pre-built templates for common workflows. You can either choose a template or create a new flow from scratch.
- Define the Trigger:
- Specify the event that will trigger the flow. This could be receiving an email, a new file in SharePoint, or a specific date/time.
- Add Actions:
- Once a trigger is defined, add actions to take place when the trigger occurs. These can include sending an email, updating a record, creating a task, etc.
- Test and Publish:
- After configuring the flow, test it to make sure it works as expected. Then, save and publish the flow.
Integration with Business Central:
Power Automate can be used with Microsoft Dynamics 365 Business Central to automate processes such as:
- Sending notifications when sales orders are created or approved.
- Automating the creation of invoices or payment reminders.
- Triggering workflows based on customer or vendor activities.
Power Automate Pricing:
Power Automate has both free and premium plans. The free plan offers limited monthly workflows, while the premium plan provides access to advanced connectors (like Salesforce, and Dynamics 365) and higher workflow runs.
Getting Started with Power Automate:
- Power Automate Web Portal: The easiest way to start is via the Power Automate website.
- Power Automate Desktop: For desktop automation, you can download Power Automate Desktop, which allows you to create desktop flows by recording actions like mouse clicks and keyboard strokes.
- Power Automate App: You can also manage and trigger flows using the Power Automate mobile app for iOS and Android.
Power Automate simplifies business processes, boosts productivity, and reduces manual effort by integrating and automating workflows across different platforms.